Procedure |
|
Removing the TEC actuator:
- In Magnus Controller, ensure that the TECs are on the drum.
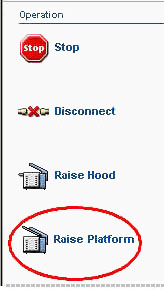
- In Magnus Controller, click Raise Platform
to raise the platesetter loading platform:
- Shut down the air supply leading to the platesetter.
- Remove the upper front panel.
- Remove punch slug bin.
- Remove the alignment system.
- Open right side door.
- Disconnect the Molex connector (TEC on-off)
from the left side of the TEC actuator:
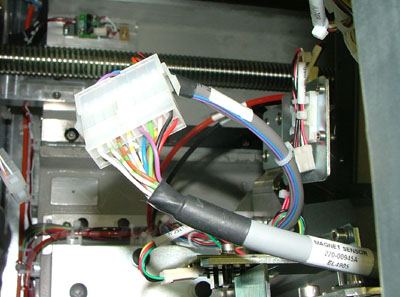
- Remove the two screws that secure the TEC home and away detector
bracket to the left side of TEC actuator:
Note: Before removing
the bracket, mark its location with a pencil.
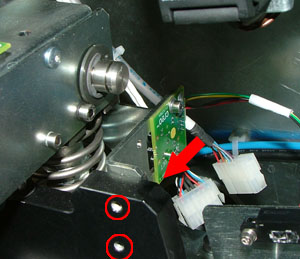
- Remove the two screws that secure the TEC home and away detector
bracket to the right side of the TEC actuator:
Note: Before removing
the bracket, mark its location with a pencil.

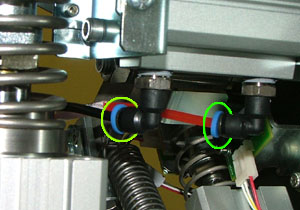
- On the right side of the TEC actuator, disconnect the two air tubes
(TEC horizontal ext. and TEC horizontal ret.)
from the TEC actuator cylinder:
- Two TEC actuator pins (one on each end of the TEC actuator) secure
the TEC actuator to the TEC actuator cylinder. Each TEC actuator pin
is held into place with two e-rings.
Use a flat head screwdriver to pry off the e-rings:
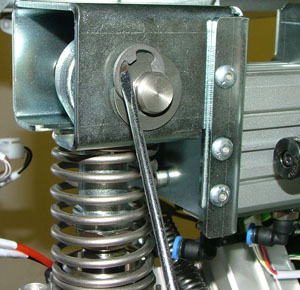
Be careful not to drop the pins’ washers into the platesetter:
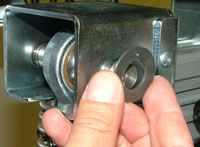
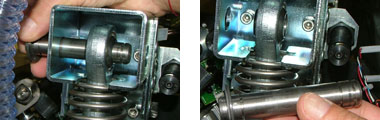
- Push out the TEC actuator pins:
- On the left side of the TEC actuator, remove the four screws that
secure the TEC actuator to the optomech:
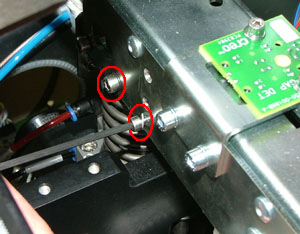
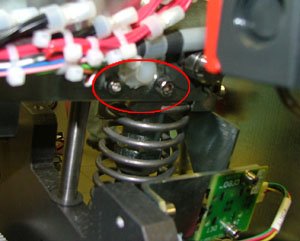
The outer screw also secures the TEC actuator leading pin in its place.
Dispose of the rib washers, because they cannot be reused.
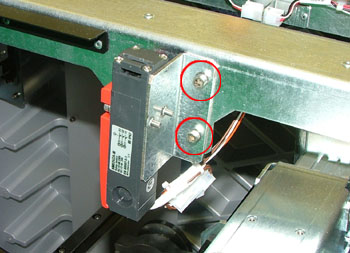
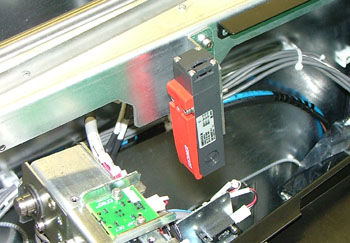
- Remove the two screws securing the left and right safety switches
to the optomech:
Note: Before removing
the safety switches, mark their location with a pencil.
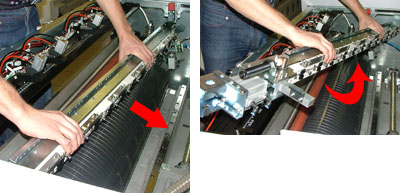
- Extract the TEC actuator by sliding it out from the platesetter and
then by rotating it 90°:
Installing the TEC actuator:
Important: Unless
otherwise stated, coat all screws in Loctite® 242.
- Install the TEC actuator into the platesetter. On the left side of
the actuator is a leading pin. Make sure the pin is inserted into its
hole on the optomech:
- On the left side of the TEC actuator, install the two screws that
secure the TEC actuator to the optomech. (View
image)
- Reinstall the TEC actuator cylinder pins, the silver washers, and
the e-rings. (View image)
- On the right side of the TEC actuator, connect the two air tubes (TEC
horizontal ext. and TEC horizontal ret.) to
the TEC actuator cylinder. (View
image)
- Install the two screws that secure the TEC home and away detector
bracket to the right side of the TEC actuator. Align the bracket
with the pencil mark. (View
image)
- Install the two screws that secure the TEC home and away detector
bracket to the left side of TEC actuator. (View
image)
- Connect the two connectors (TEC on off and TEC
horizontal) to the left side of the TEC actuator. Align the
bracket with the pencil mark. (View
image)
- Reinstall the two safet switches. (View
image)
- Close the right side door.
- Reinstall alignment system.
- Reinstall punch slug bin.
- Reinstall the upper front panel.
- Manually close the loading platform.
- Open the air supply leading to the platesetter.
|

