Home | Contact Us | Submit Troubleshooting Info | Search | Help
Output | Software Solutions | Proofing | Color, Screening and Calibration | Scanning | Digital Photography | Consumables | POS
Home | Contact Us | Submit Troubleshooting Info | Search | Help
Output | Software Solutions | Proofing | Color, Screening and Calibration | Scanning | Digital Photography | Consumables | POS
Ripro Backup (Legato) TIC - Installation Guide
Previous Page | ToC | Next Page
Networker Installation and Configuration
Defining a Backup Device
Determining the Backup Media Devices
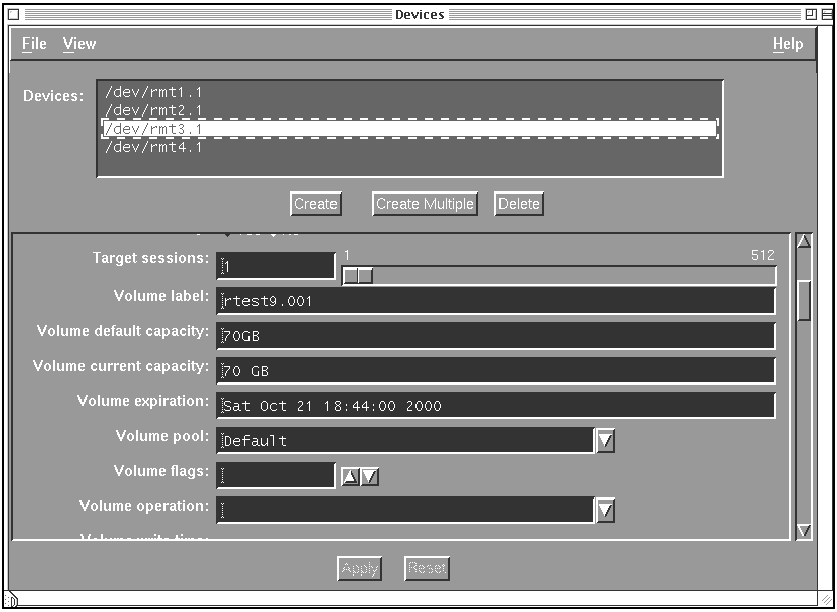
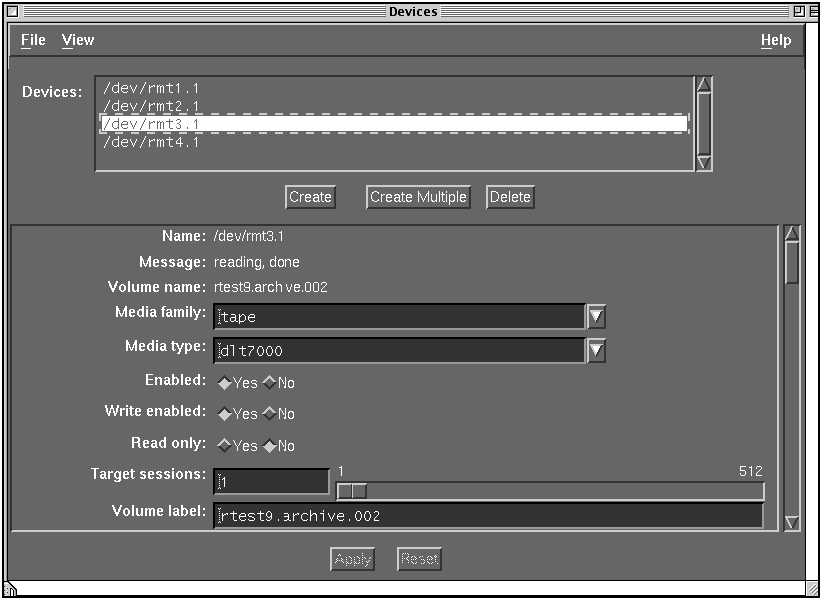
| Media Family | Tape |
| Media Type | DLT or DLT7000 |
| Read Only | No |
| Target Sessions | 1 (per device) |
| Volume Default Capacity | 70GB (30GB for |
| Jukebox Device | Yes |
| Cleaning Required | No |
| Cleaning Interval | 2 weeks |
| Auto Media Management | Yes |
| Unlabeled volume loaded? | Yes |
| *Enabled | Yes |
| *Write Enabled | Yes |
Note: Disregard error message “nwadmin error, no jukebox found”.
Note: The Enabled and Write Enabled fields appear only after Apply is clicked.
- Install an Autodetected SCSI Jukebox?
- Install a Serial Jukebox?
- Install an SJI Jukebox?
- Install an RLM Jukebox?
- Install an STL Silo?
What kind of Jukebox are you installing?
Name you would like to assign for the Jukebox device?
Pathname of control port for the jukebox device
Do you want automated cleaning support enabled [yes/no]
Enter pathname of media drive.
Note: For multiple drive Jukeboxes repeat this command for each device.
If your device has a barcode reader support, do you want barcode reader support enabled? (yes/no).
Note: Breece Hill and ATL models have barcode support.
Do you want volume labels to match barcode labels? (yes/no).
Note: A specific labeling is used for CreoScitex backup and Archive.
Jukebox has been added successfully
- The Devices field should read /dev/rmt1.1 (J), where (J) represents jukebox and (status) is the working status of the jukebox (e.g. unmounted or reading etc.)
- This field is not identical for a single cartridge device or for multiple drive devices.
- This ends procedures for software and hardware installation and configuration.
You should now enable and authorize the software. Refer to Enabling and Authorizing NetWorker.
 |
Note: If the scheduled Archive option exists, there may later on be four (4) types of pools and labels: Backup, Backup Clone, Schedule Archive and Schedule Archive Clone. |