| |
This procedure includes the following sections:
Upgrading the Hardware
- In the Magnus 400 Controller software, open the front and right-side
doors.
- Quit the Magnus 400 Controller software, and any other software that
might be open on the client workstation.
- Turn off the Magnus 400 platesetter and disconnect the main power
cable.
- To enable easy access to the SCU, remove the top and side (left and
right) panels, and then open the SCU front door.
- Assemble the left middle slide (371A14630) by securing it to the mainframe
with four cross-head screws, as shown below.
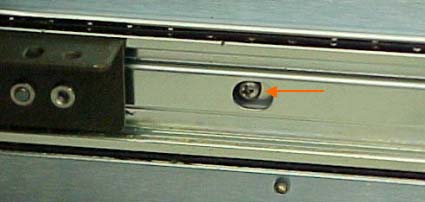
- Repeat step 3 for the right middle slide.
- Pull the slides out of the SCU, as shown below.
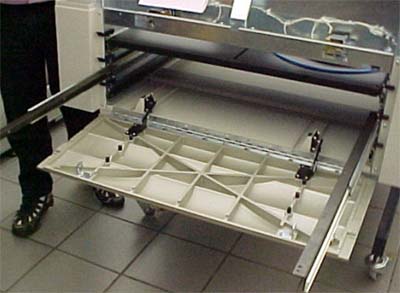
- Position the middle tray (500-01020B) on the slides, above the door
stopper.
- Secure the middle tray to each slide with five screws.
Note: Apply Loctite® adhesive on each of the screws.
- Push the middle tray into the MCU.
- Repeat steps 4–10 for the upper tray.
- Close the MCU door.
- Assemble one of the middle tray protecting rollers assemblies (500-02473A)
and secure it to the mainframe with four flathead screws (two on each
side), as shown below.
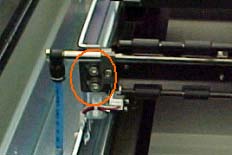
Note: Make sure that the air nozzles on the protecting rollers
assembly are facing the cassette, as shown below.
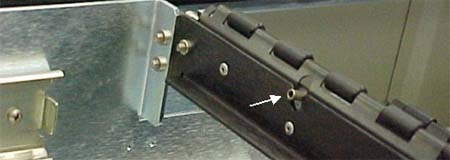
- On the right side of the platesetter, attach the air supply tube to
the protecting rollers assembly.
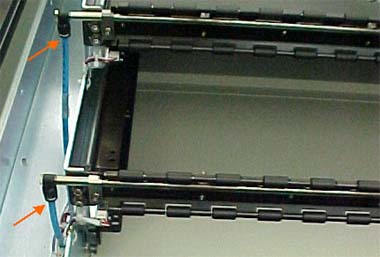
- Repeat steps 13–14 with the other protecting rollers assembly.
- Re-assemble the top and side panels on the MCU.
- Turn on the platesetter and insert the latest Magnus 400 Controller
version CD into the CD-ROM in the platesetter.
Upgrading the Configuration
- In Microsoft Windows® Explorer, go to C:\Magnus\Magnus400\DataBase\CassetteDataBase,
and then right-click 001.Cassette and select Properties.
- In the 001.Cassette Properties dialog box, in the Attributes
area, clear the Read-Only check box.
- Verify that all the files in the DataBase folder have write-enable
status (and not read-only).
- Install the software.
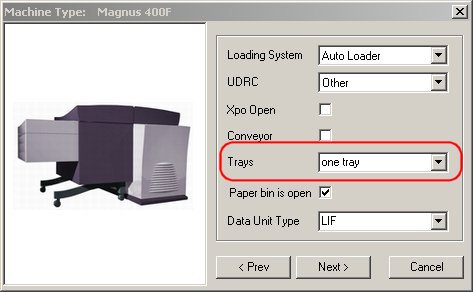
- In the Machine Type: Magnus 400 dialog box, in the Trays list,
change the value from one tray to three trays, and then finish
the software installation.

|

